Now that you have Unreal Engine and Editor up and running, it’s time to start migrating your digital assets from Blender into the Editor. In this post we will discuss some of the prerequisites for building certain assets in Blender, then exporting and finally importing and setup within Unreal Editor.
Build the model in Blender
In fact, you are not limited to Blender in terms of building your models for Unreal Engine 4 (UE4) however, we will be focusing on Blender as it provides a great deal of versatility in terms of content creation. We will focus on an animated 3D character that will be exported via the FBX file format, then imported into UE4. When building assets such as this for a real-time engine there are certain considerations to take note of. Working with an application such as Blender in conjunction with UE4 requires a certain degree of understanding as to what role each software plays in the production pipeline. In other words, there are certain tasks that Blender performs well that should be completed before a model is exported for UE4. Among these considerations are,
- Topology
- Non-overlapping UV’s
- Texture mapping
- Rigging and Animation
Model Considerations
Topology: Build your models without non-manifold geometry and with edge loops that are placed with consideration for accurate deformation during animation. Although, it will require some experience in getting this right you can start by learning about the basics on this free course.
Non-overlapping UV’s and Texturing: Your model should have it’s UV’s laid out before it is exported from Blender. When unwrapping your model’s UVs to export for a real-time application, its generally best to maximize usage of the 0 to 1 UV texture space, keep your textures square with dimensions between the 4th to 13th power of 2 exponents. You can read more about understanding UV’s here.
Rigging and Animation: Blender has a vast toolset for creating simple to exceptionally complex animations and supporting the content creation process with advanced rigging features. Although you can create animation in UE4 and will certainly encounter times when this is necessary, mastering animation in Blender will certainly be beneficial with regards to raising the quality of your final output significantly. Learning animation is a time-consuming process if this is not in your interests simply utilize readily animated models.
Exporting a Model and Rig
Once you have your model prepped with all the above criteria checked, it’s time to begin the export process. In the interest of keeping things simple, we are not going to focus on export settings and the finer details involved therein. Simply, we will examine the process as an overview in order to equip you with the tools to get an animated character from Blender into Unreal Engine 4. Taking a research-based approach to learning, from that point, will help accelerate your project to the next level.
As mentioned in a previous post, when exporting a model, Location and Rotation transforms should be 0 for all axes.
Scale transforms should be at 1. This is both applicable for the model and for the armature.
When choosing a unit of measurement such as Unit system, Metric or Imperial it would be considered best practices to remain consistent with the same system throughout the entire project. Doing so could contribute towards creating models that are imported at the correct scale, and ultimately save you some time.
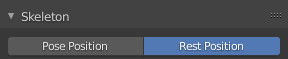
You will not require any animation for this first step. All that is required is that the model is bound to the rig and adequately weight painted prior to exporting. With the rig selected go to frame zero, and enter the model’s Rest Position if it is not already in rest pose. If there are any objects in the scene other than the model and rig, such as lights, camera or other objects simply delete them. Ideally, just the 3D model and rig should remain.
With your rig selected enter Pose mode (from the 3D Viewport not Pose Position as opposed to Rest Position i.e. remain in Rest Position) and rename the top-level parent bone, that is the highest bone in the rig’s hierarchy, to Root.
To reiterate on the process we will first be exporting just the model and rig. Once we are happy with how this has imported into UE4 we will then continue to export the animation.
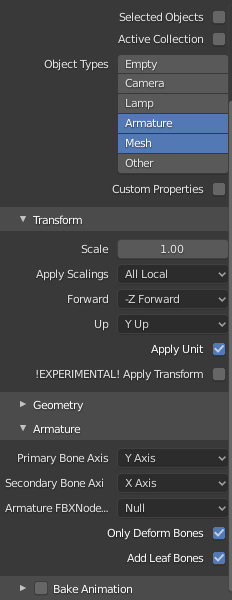
As we are only interested in the Armature and Mesh, select those object types from Blender’s FBX export options dialog. Although if you already deleted all other object types as previously noted then your object types would have been implicitly set.
In the interest of separating animation out of this file, if any already existed, it is recommended to uncheck the Bake Animation setting at first.
When exporting your media to UE4, keeping things as simple as possible is key. Therefore if you are able to create a workflow that enables only exporting Deform Bones successfully then, checking the Only Deform Bones option can help to significantly reduce file sizes and speed up the import/export process.
Bear in mind that if you choose this option for the initial exporting of the character and rig, you should keep this option checked for exporting all remaining animations.
You are now ready to export the file. Save the file to a unique name.
Project Setup
Launch Unreal Editor to configure a new project. If you have not installed UE4 yet start here. Select Game for the type of project and Blank for the Project Template.
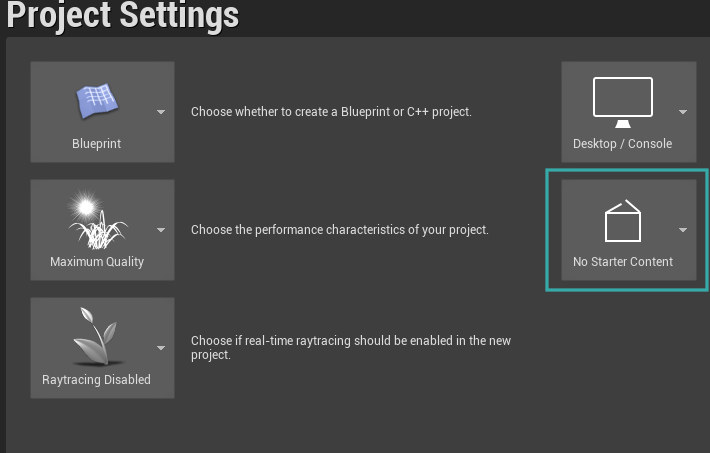
Choose Project settings that match your systems capabilities as well as your intended output. You can always change these settings at a later stage. There is no need to include Starter content as we will be importing our own content. We won’t be covering Blueprints in this particular post.
Level Setup
Once you have your project setup, the launcher will exit and the Editor will open .
The primary areas we will be focusing on within the editor are the
Content Browser: This is, by default, located at the bottom of the screen.
Viewport: The viewport is used for a close representation of what your final output may look like. It’s worth, however, noting that your game’s performance should not be measured by that of the viewport’s.
Preview: A preview creates a much more accurate representation of your applications performance and appearance and therefore the final outcome.
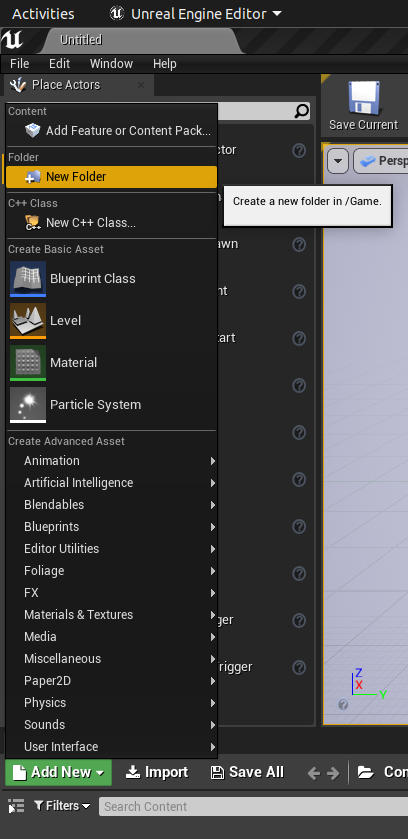
From the Content Browser click Add New and choose New Folder. A new folder will appear within the Content Browser. Rename the folder to your liking, it will be used to store the assets you import into your scene.
Import the Mesh and Rig
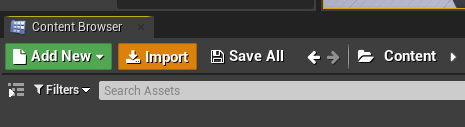
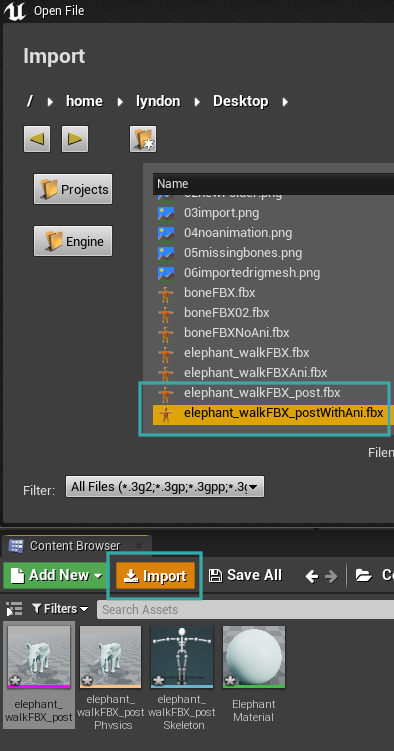
With the new folder you just created open, click the Import button within the Content Browser. A file dialog will appear, navigate to where you exported your files from Blender.
Select the FBX file you exported with no animation. This file should only contain the 3D mesh and Rig.
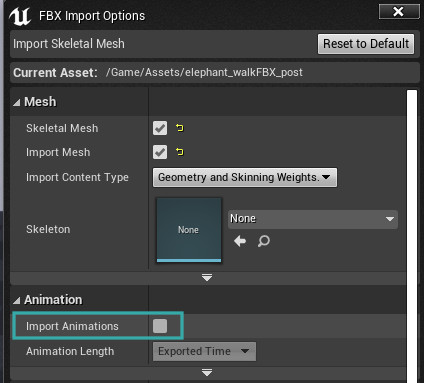
You will be presented with FBX Import Options within Unreal Editor. Ensure that Skeletal Mesh and Import Mesh are checked, Import Animations should be unchecked.

If you chose to Export from Blender with Only Deform Bones selected, you may receive a warning within Unreal. This is not an error, it is simply a warning and should be expected due to the noted export configurations. You are free to close the dialog as it will have no impact on your workflow in this instance.
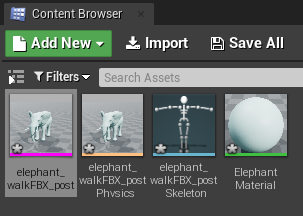
Several new assets will now appear within the Content Browser. Depending on how you exported your asset from Blender, you should as a minimum requirement see the 3D Mesh object, a skeleton (a representation of your Blender Armature), a material node and a physics node.
Import the Animation
At this point you are now ready to begin importing your animation.
From the Content Browser click the Import button again, this time select the FBX you exported with the animation.
It’s worth noting at this point that since you have already imported your 3D mesh, in the interests of keeping your assets at a small and manageable size it is possible to delete the mesh from this file entirely and retain only the Armature with animation. This is something you could have done in Blender before exporting the animation.
Either way you can always simply delete the duplicate 3D mesh from the Unreal Editor Content Browser.
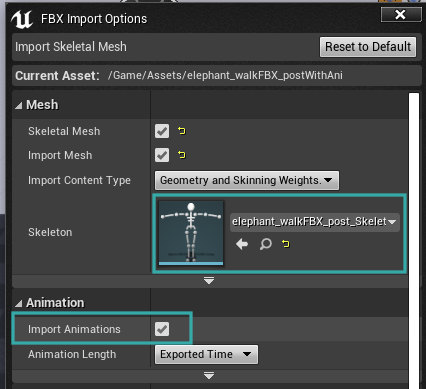
When importing the animation Unreal should be able to detect the rig it applies to. It will, therefore, select the rig, as can be seen from within the FBX Import Options dialog under the Skeleton section. You can also click on the drop-down menu to manually select the appropriate rig.
Ensure that Import Animations is checked this time.
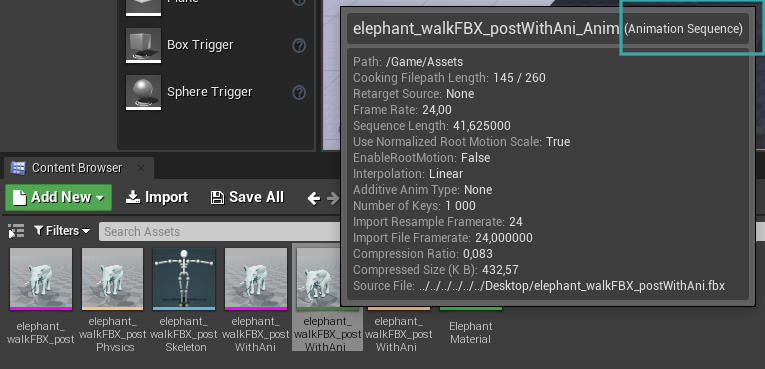
Again you will notice that several new assets have been created. To preview the animation double click the Animation Sequence asset.
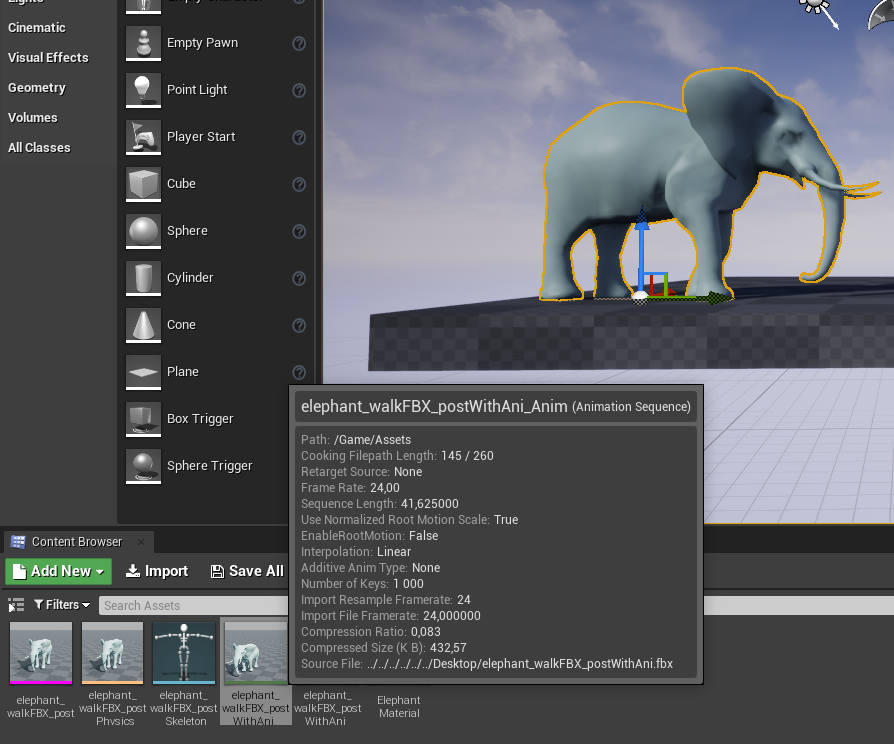
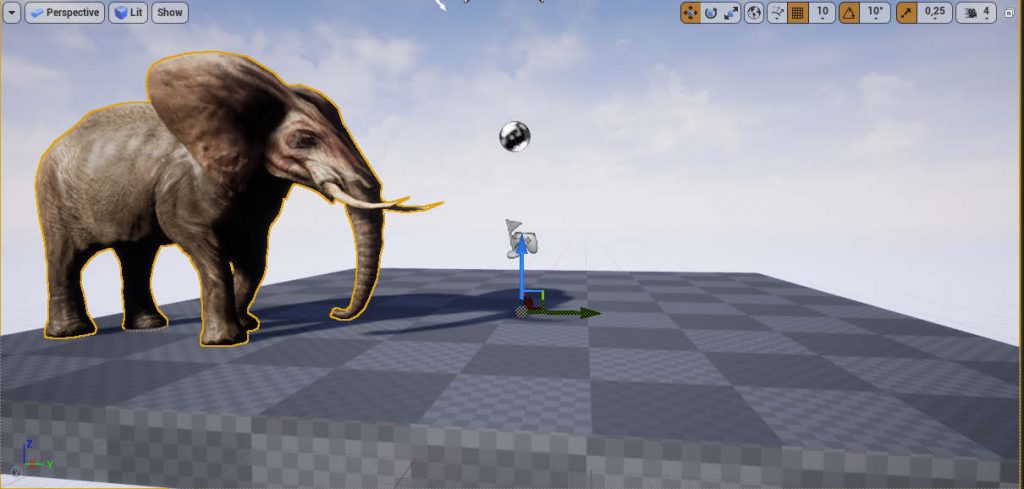
To place your animated character into the Level, click and drag the Animated Sequence asset into the Viewport. You will be able to place it on the ground plane.
Create and Edit Materials
Now that you have imported your animated character into your Level, its time to turn your attention to editing it’s materials.
When your 3D mesh was imported by default Unreal would have created a new texture for it.
Simply double click this material from the Content Browser and the Material Editor will open with the noted material loaded for editing.
Let’s now examine a quick material node setup.
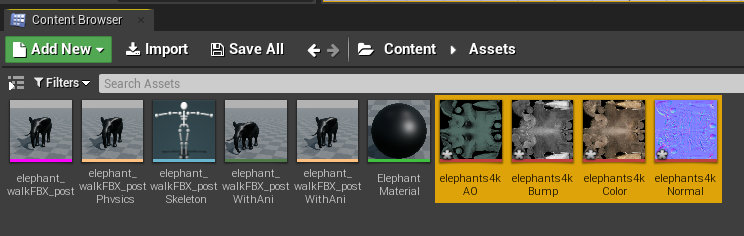
Before we start setting up our material you will need some textures to apply to the material. Textures can either be created by hand, from photo references or by baking from Blender. How you choose to create your model’s textures will be determined by the type of outcome in terms of the aesthetic and technical requirements of your project. You can learn more about the texturing process in this free course.
To import your textures into the project simply follow the same procedure for importing any asset, from the Content Browser click Import.
Once your textures have been added to your project it is time to connect them to your model’s material. Double click the material in the Content Browser to open the Material Editor.
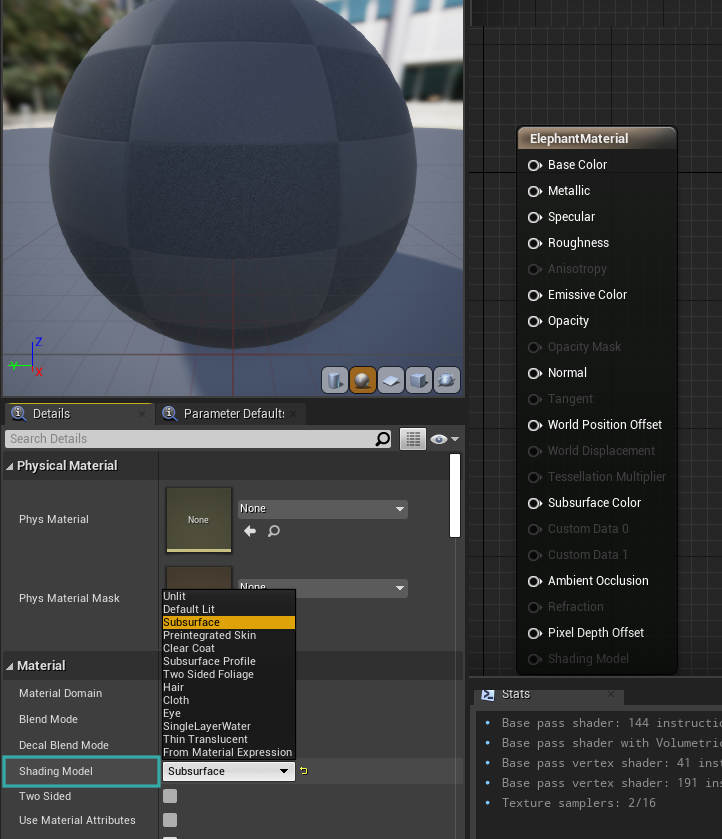
Depending on what Shading model you have selected for your material certain material inputs will be available and some not. If your model is of an organic character you could choose the SubSurface shading model, thereby making the SubSurface Material Input available.
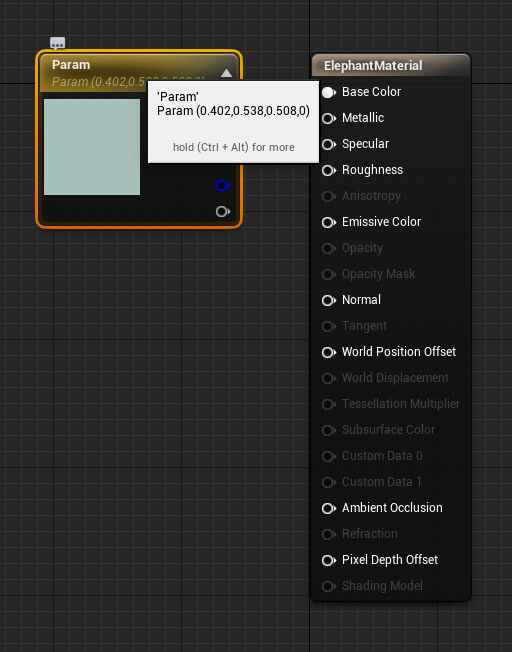
In order to add the textures, you imported to the material inputs, hold the “t” button on your keyboard and left-click in an empty area within the material editor’s graph-like background. A new Texture Sample node is created.
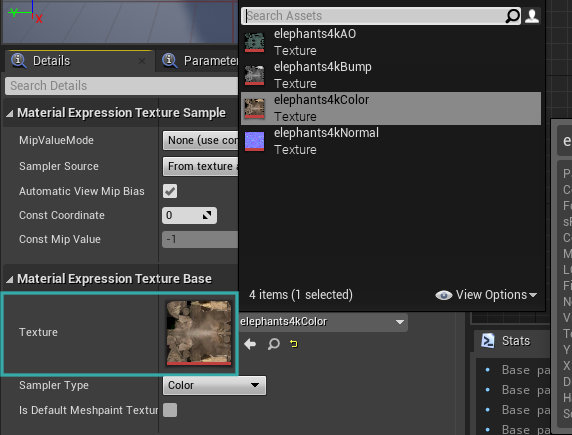
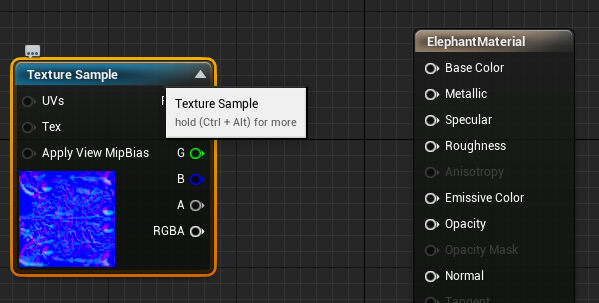
In the Texture Base section of your Material details panel (by default on the left-hand side of the screen), you will find a drop-down menu allowing you to select one of the textures you imported. If you are connecting the model’s base color choose your diffuse/color texture, if you are connecting a Normal map choose the Normal map texture you baked from Blender and so forth. You can read more about the different texture types here.
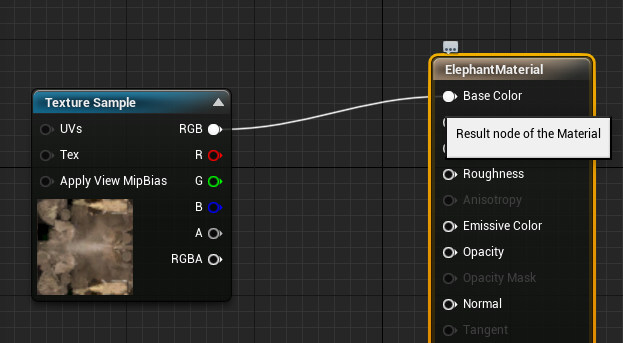
With the correct texture selected you are now ready to connect the texture to your material. There are a variety of different possibilities in terms of how to make this connection but for the sake of simplicity, let’s assume you are attempting to connect a diffuse/color map to your material. In this event click and drag from the Texture Sample RBG output and a connector will appear. Hover over the material’s Base color Input and you will notice a green checkbox appear. This indicates a valid connection. When you see this connection, stop dragging and the connection will be made.

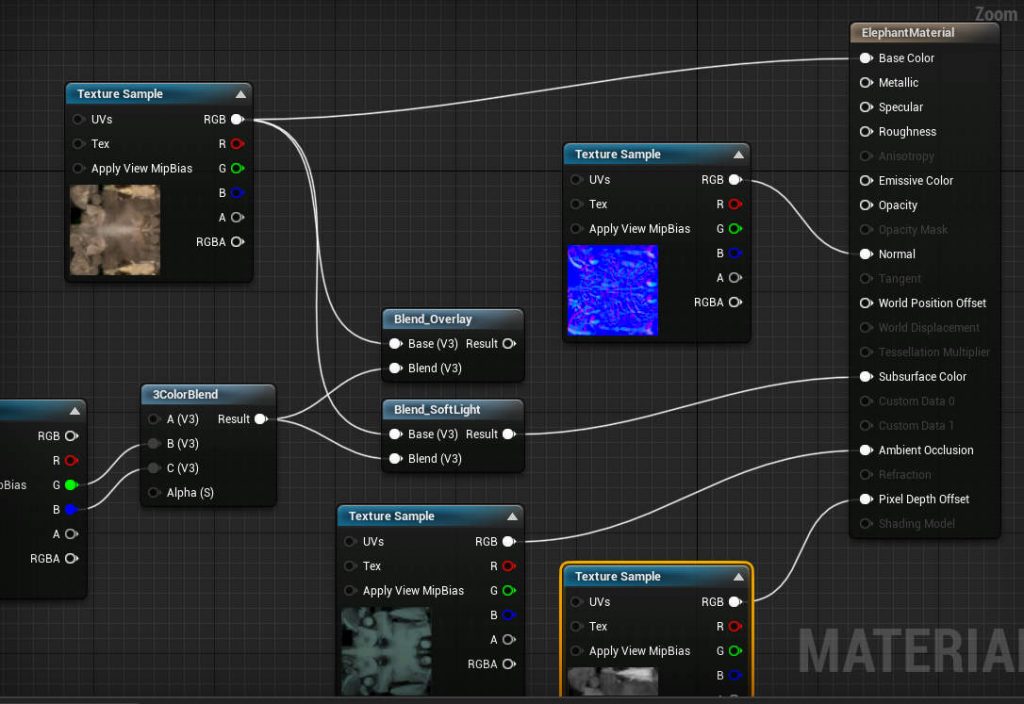
Continue to connect and experiment with other textures in a similar way, until you have connected all of the textures you have imported. You can preview how the changes you make to your material affect your model as you edit your material. Simply click the Apply button in the material editor and position it such that you can see both the material editor and the viewport simultaneously.
Once you are satisfied with your material, click Apply then Save in the Material Editor. You can now close the Material Editor and your your materials will be visible on the model within the current Level.
Exclusive offer for Learners

Jumpstart your learning with this exclusive limited offer for RabbitMacht learners. Get the elephant model used in this post with textures, rig and animation at a phenomenal 50% discount! Apply the coupon code below at checkout and get your Royalty Free model to use in your own commercial and non-commercial projects.
*This offer expires at the end of August 2020 and is only available for the first 10 customers.