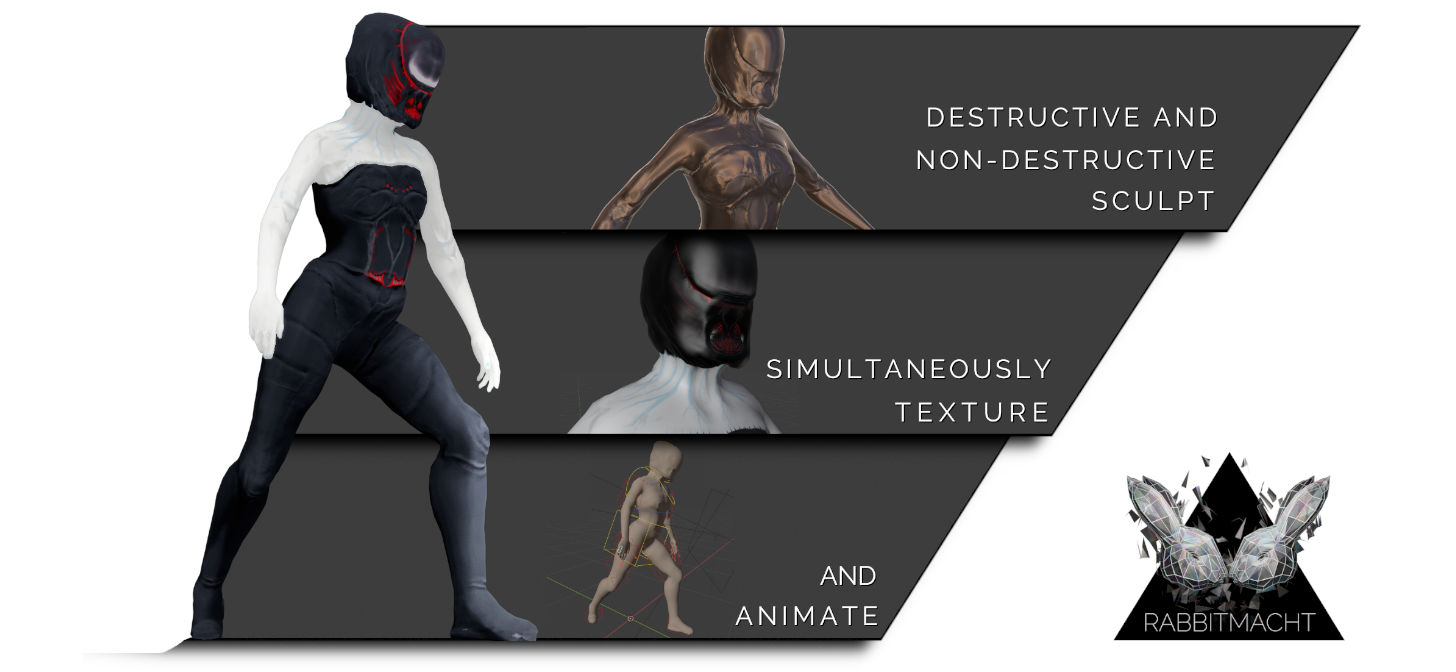
When developing 3D characters it’s important to retain as much of a non-destructive workflow as possible.
This is particularly important with regards to games development as the models used in the final output will often have certain elements baked into texture maps.
Without a non-destructive workflow, modifying a baked a texture map or rebuilding components of your character might be your only option when making changes to your final output becomes necessary. It can be particularly difficult to achieve your desired results as it requires a very indirect approach to editing, thereby compromising on control, detail and taking up more time than necessary.

A non-destructive workflow means retaining as much of the character’s creation history as possible. This means that reverting to different stages in your character’s creation process becomes a lot more accessible. You can then make the changes where necessary (be it at the modelling, texturing, sculpting, rigging or other stages) and automatically allow those changes to propagate throughout your character’s production pipeline.
Although setting up characters in this way might require a bit more planning, initially, once you get into the hang of it and start seeing the benefits of how much time it can save you in the long-run the technique will soon become a necessity in your character development toolkit.
Setting up a reference
Starting with references is typically advisable. They could either be 2D images or, as in this case, we are using a 3D model of a wraith-like-character.
Cleaning the reference
This reference model will not be used in the final output as it simply forms the starting point within the modelling process. This reference model also consists of a great deal of non-manifold geometry which would make attaching it to an armature unpredictable.
As the character we are building is designed to be more streamlined and agile we will not need a lot of the accessories attached to this model.
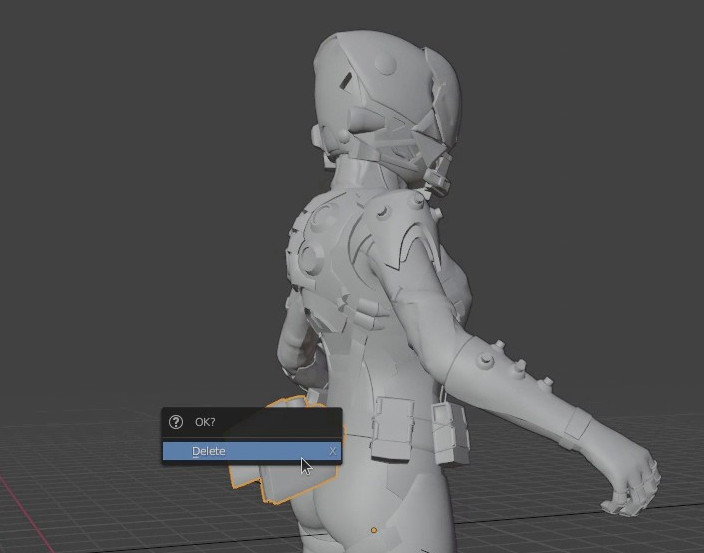
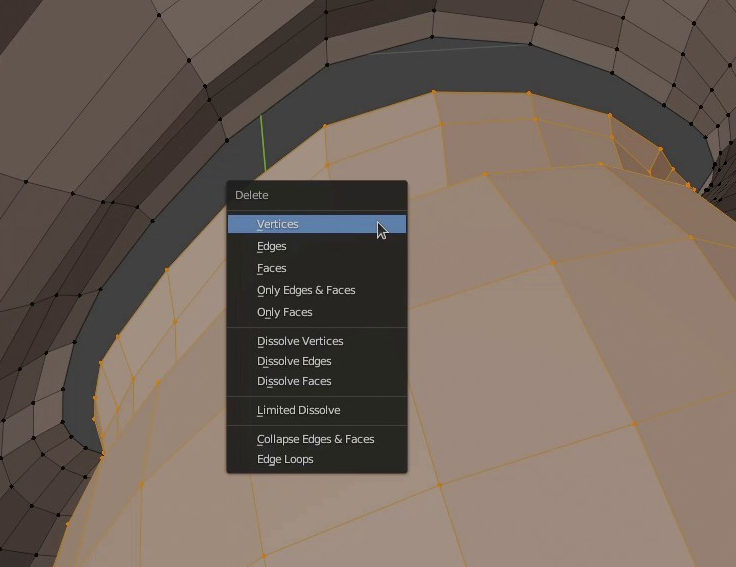
With the reference model selected simply,
- Go into Edit mode,
- Select a single vertex from the model’s component you want to delete.
- Hovering over the 3D Viewport, hit L on the keyboard
- and Blender will select all connected vertices.
This makes deleting whole portions of the model much easier.
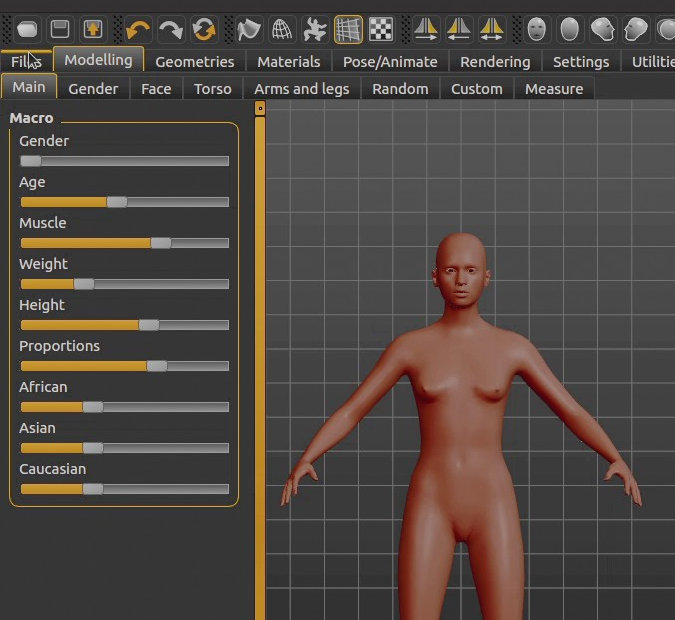
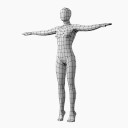
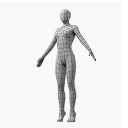
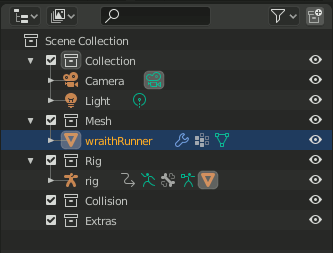
MakeHuman is an open-source application for generating human-like 3D characters.
Primarily we use MakeHuman as it gives us a base mesh with edge loops that deform really well during animation and an efficiently laid out UV map that maximizes on 0 to 1 texture space.
The MakeHuman model is then exported as an OBJ file and imported into Blender. The OBJ file format has the added bonus of retaining a model’s UV layout.
Line the MakeHuman model up with the reference model. When modifying the models, avoid transforming the models at the object level. In other words, when scaling the model to match your game engine’s units do so in Edit mode. Select and scale the model’s vertices towards that of the reference model. This ensures that translations and rotations for the game model remain at 0 while scale for all axes remains at 1. This results in more predictable, in-game behaviour for your assets.
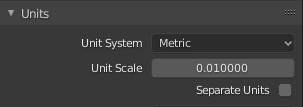
When creating content for the Unreal Engine you should ensure that your scene units are set to metric with a value of 0.01
It’s worth pointing out that currently, we are setting up the reference model. The previous image depicts the reference model with its original arms removed and replaced with the make human models lower arms and hands. The original model has also had half of it deleted then mirrored on the remaining half.
This symmetrical modelling technique is not advised for the model that will be exported to UE4 as it will result in overlapping UV’s. However since we are going to discard the reference once we have applied its vertex positions to our export model, use of the mirror modifier is perfectly acceptable in this case and will result in no side effects on this character’s pipeline.
Modelling The Base Mesh
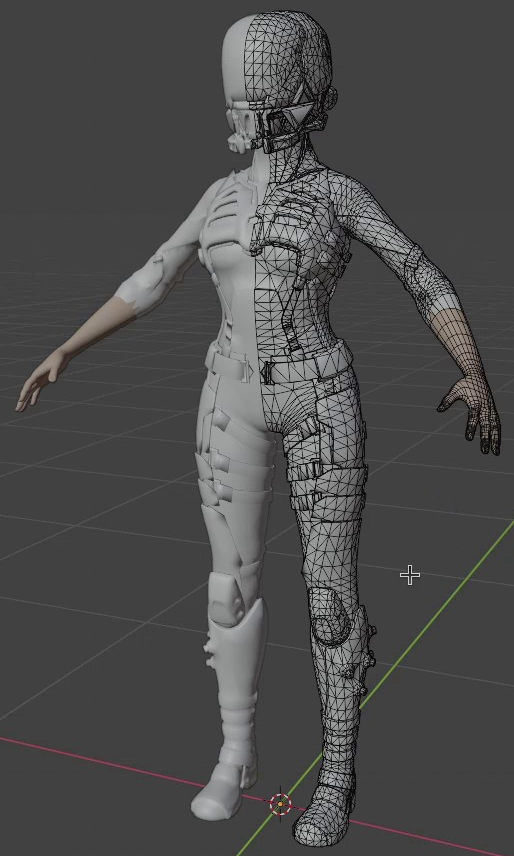
Once the reference is completed it’s time to shift our focus to the main model (Base Mesh). We’ll start with modelling as this is the only stage in the character’s pipeline with destructive properties.
The Base Mesh will be set up for the non-destructive workflow and ultimately exported into our game at various Levels Of Detail (LOD’s).
Again, we start by importing the same MakeHuman OBJ model and lining up to our reference that we recently modified.
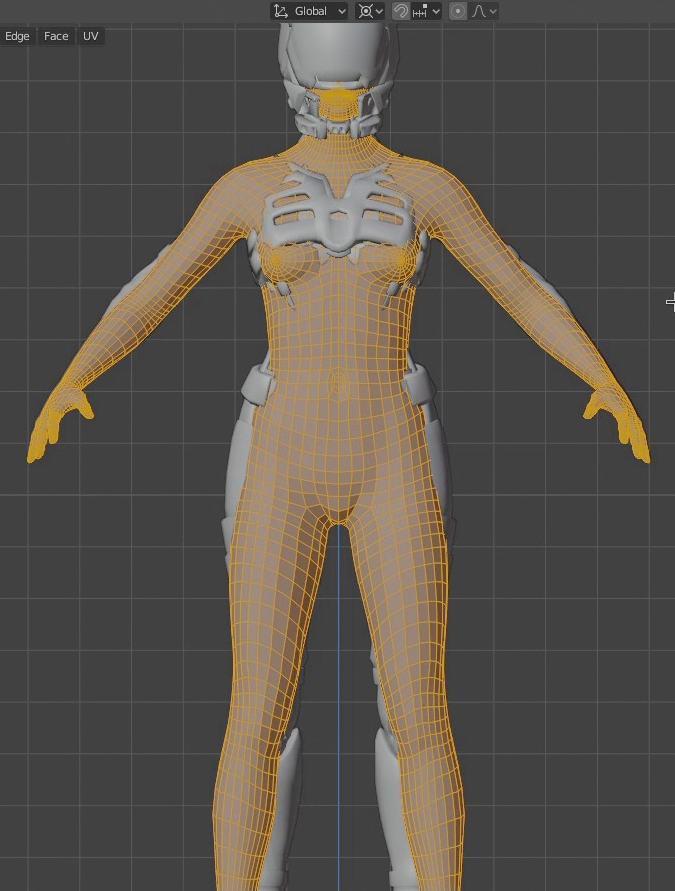
Although it will be helpful lining up the two models as close as possible in some cases this won’t be necessary as certain components from the reference will not be required for the final output.
You can also save yourself some time by avoiding lining up your Base Mesh with the reference when parts of your Base Mesh need to be re-modeled. For Example, the eyes and eye sockets as well as the toes.
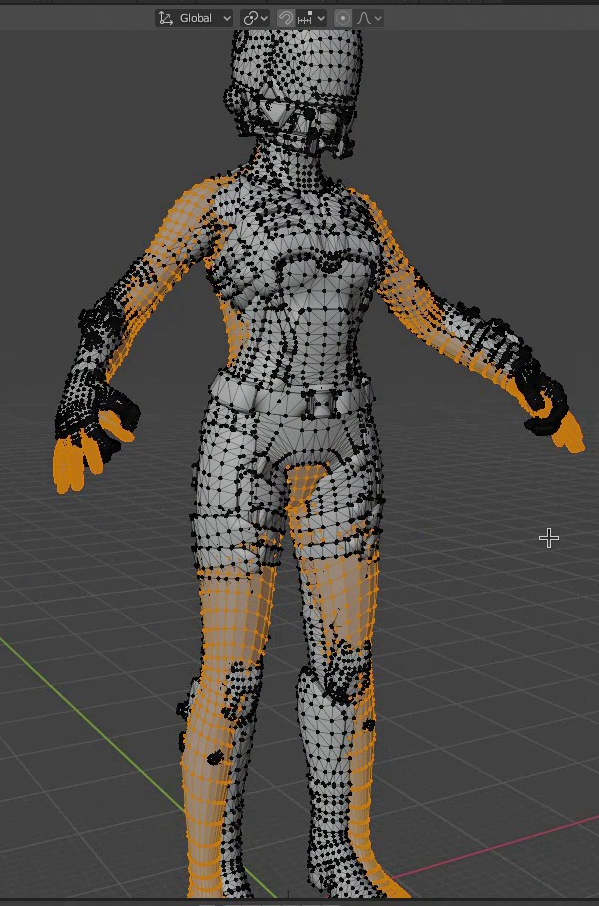
Regardless of whether your character is being exported for a game or not, working with efficient geometry that is less taxing on system resources is generally advisable.
As a result, select the components of the Base Mesh that are not required such as the Eyes, Eye sockets, Ears, Toes and any other unnecessary geometry and delete their faces.
It’s worth noting that this operation is destructive, in that we are permanently modifying the Base Mesh.
The main side-effect of this step is that it will typically result is non-manifold geometry on the Base Mesh. Correcting this would be far simpler and quicker than modelling or retopologizing the Base Mesh from scratch, particularly with the use of Blender’s Grid Fill operator and UV Stitcher.
Your completed Base Mesh, at this stage, should not comprise of non-manifold geometry and have as few UV islands as possible. By retaining and leveraging on the MakeHuman model’s topology and already existing UV layout you will be able to save yourself a great deal of time and effort.
Blender’s Shrinkwrap modifier is used to match the vertex positions of the selected object to the shape of the targeted object, by displacement.
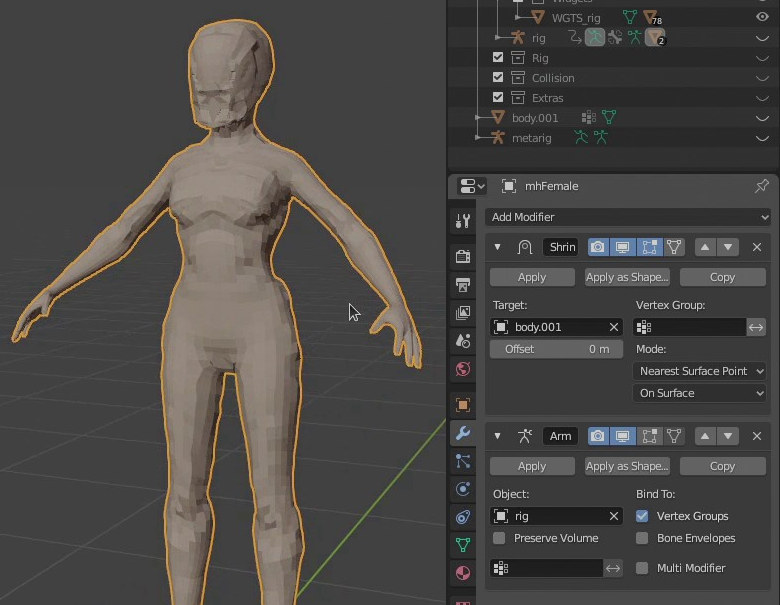
The target in this case is the reference model and the selected object would be the Base Mesh.
Much of the non-destructive nature of this workflow relies on the Shrinkwrap modifier and as you will see this modifier will be utilized at different stages throughout character development.
A Rig is not a tool that is exclusively reserved for animation
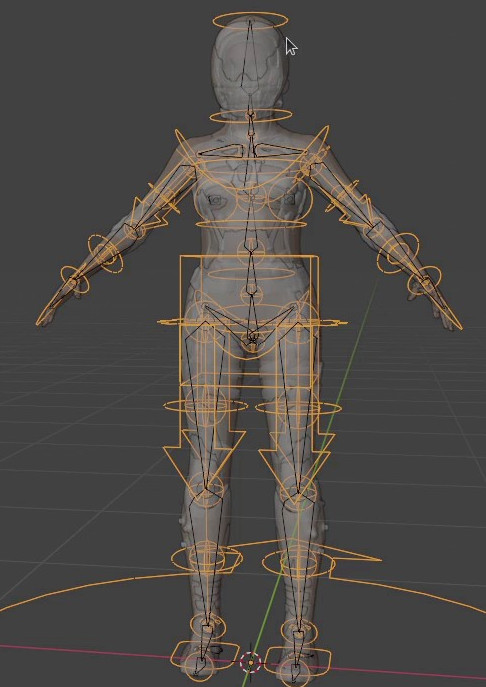
In fact, it is often necessary and efficient to use a rig for modelling. For example, when trying to match your Base Mesh to your reference model a common problem is that they may be in different rest poses. One might be in a T-pose while the other is in an A-pose.
In this case, trying to transform vertices manually and avoiding the use of the mirror modifier (for the same reasons noted above) would be an ineffective and inaccurate solution.
Setting up a quick Forward Kinematics (FK) rig for your output model then matching its pose to your reference model’s pose would be far more efficient and accurate. As this technique is non-destructive it would also be possible to set up and use your final rig at this stage too.
Destructive and Non-destructive Sculpting
Sculpting is an important part of the character development process as it provisions a stage to add necessary details to your model and bring your artworks to life.
It’s important not to use a destructive sculpting technique on the Base Mesh so as to retain the UV’s and vertex groups that would have resulted from UV projecting and rigging (in previous steps).
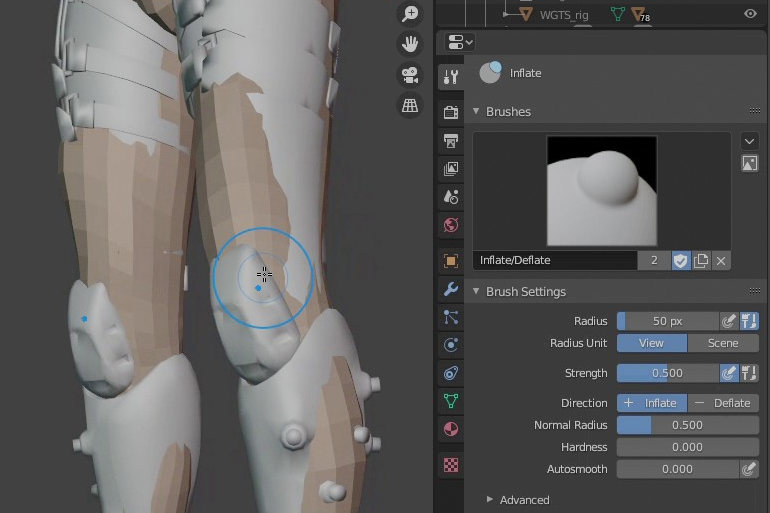
At first, we are not utilizing Dyntopo but, simply displacing the existing vertices of the Base Mesh to be slightly above the surface of the reference model.
It’s not ideal to make large scale adjustments to the model’s form at this stage. This would both differentiate from the reference and could cause unpredictable results with the Shrinkwrap modifier. As a result, you may want to avoid the use of tools such as the Grab brush.
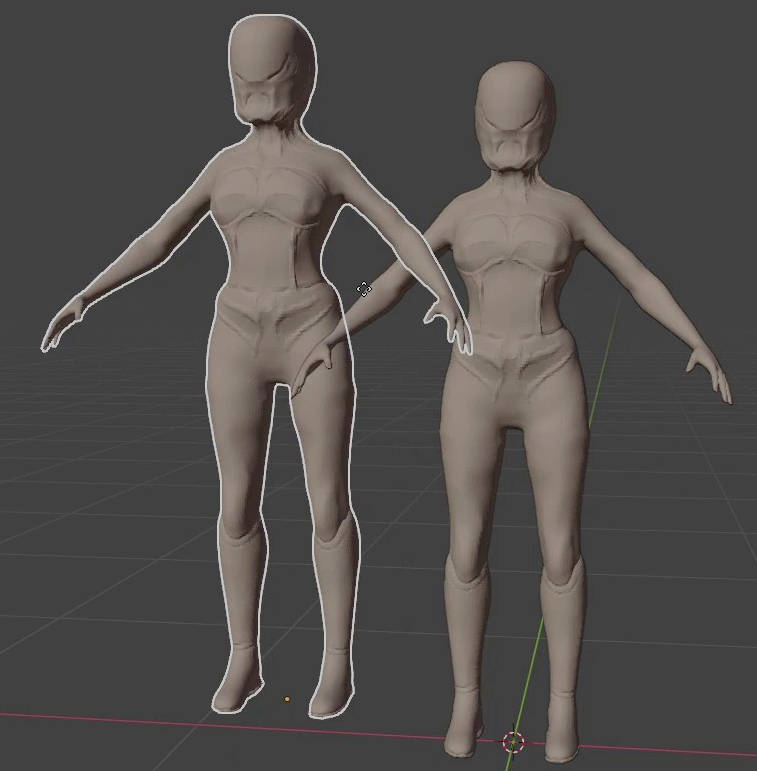
Once you are satisfied with the general look of your Base Mesh and how it targets your reference model, duplicate the Base Mesh with Shift-d in Object Mode.
This image depicts the duplicated Base Mesh slightly offset from the original Base Mesh, however, this is just for demonstration purposes. As previously noted it’s advisable not to translate any of the models at an object level for the purposes of this setup and exporting.
To ensure that your objects remain in the same position, you could lock the object’s transform properties within the 3D viewport to be certain that you don’t inadvertently move the duplicate or the Base Mesh.
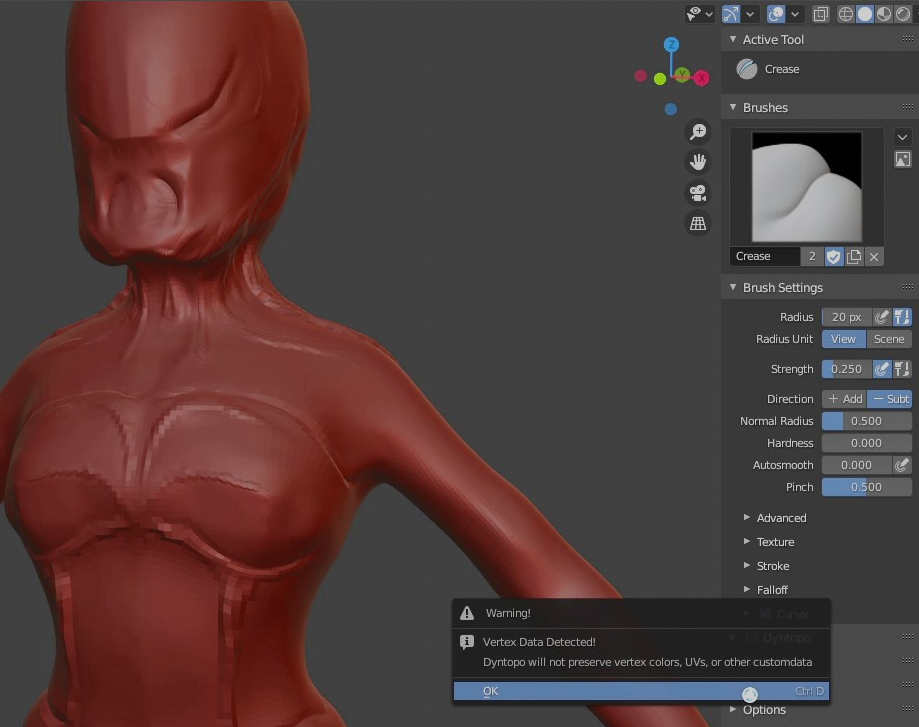
Hide the Base Mesh, select the duplicate and enter Sculpt mode.
Once in sculpt mode you can now enable Dyntopo. This will give you the ability to sculpt with the resolution and precision matching the requirements of your Normal map.
The only limitation at this stage when sculpting again relates to avoiding the application of large scale form adjustments. However, this should not be your focus as essentially you are working towards creating a Normal map and large scale adjustments to your character’s form should not be necessary at this stage.
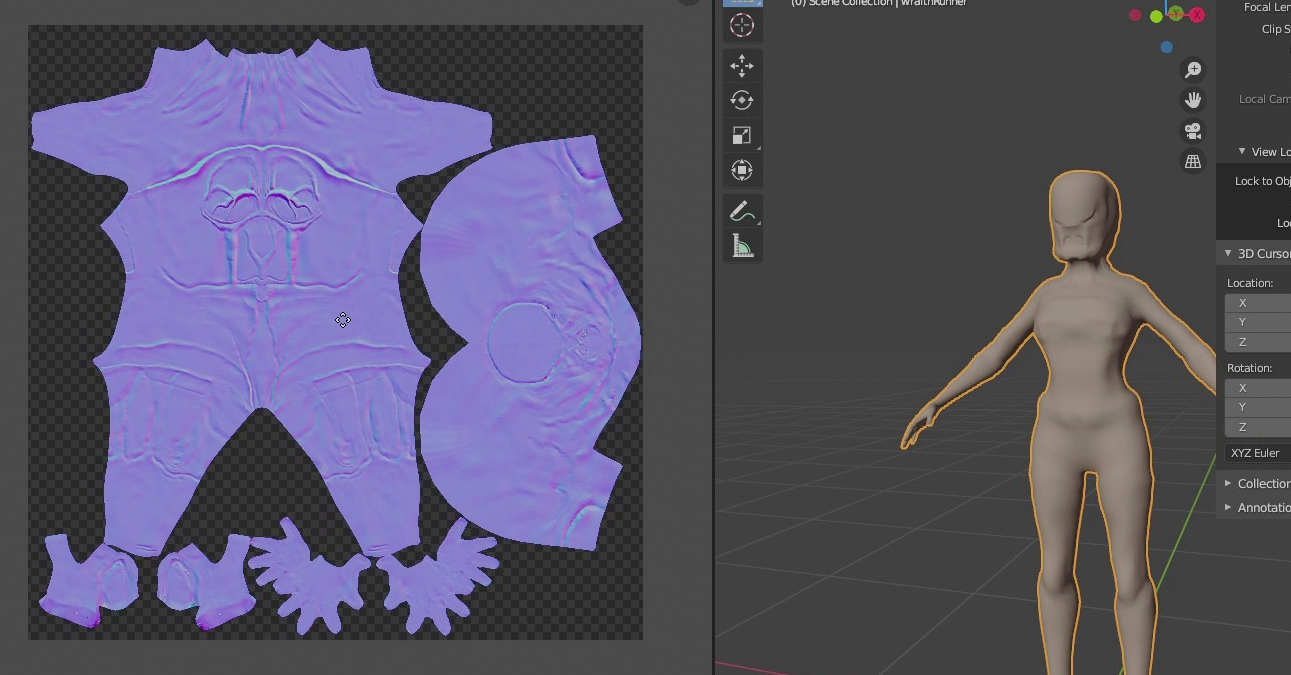
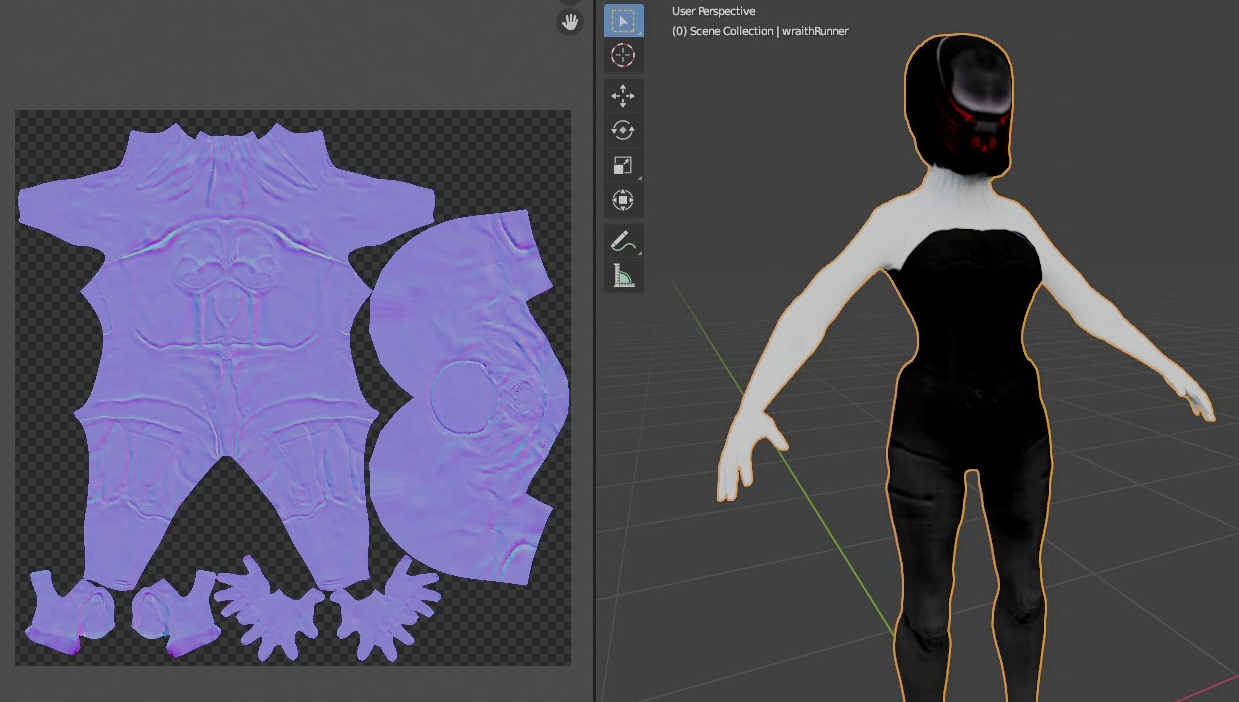
Baking A Normal Map
In order to keep your character’s poly count to a reasonable amount, a Normal map will be required to recreate the details, applied through Dyntopo sculpting, within the game engine.
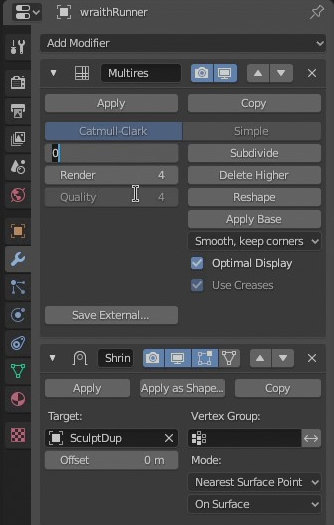
To create a Normal map for your character, exit Sculpt mode and select the Base Mesh. Apply a Multires modifier followed by a Shrinkwrap modifier to the selection, this time target the duplicate sculpt model for the Shrinkwrap. The order of modifiers is important.
Subdivide with the Multires modifier as many times as is required to recreate the sculpted details.
Apply the Shrinkwrap modifer at the highest level of subdivision to ensure that you are able to Bake Normals correctly.
When it comes to exporting the character for your game this setup will also give you the ability to export multiple Level Of Detail (LOD) meshes.
Once you are satisfied that you have enough subdivisions within the Multires modifier, set your character’s Display Subdivisions to 0.
Switch your Renderer to Cycles.
In the Render Properties Panel, under Bake choose the Bake from Multires option and set the Bake Type to Normals. You can now bake your character’s normal map.
Retain all the components that went into this setup and you will have a non-destructive approach to sculpting and generating a Normal map for your character at any stage in it’s production pipeline.
Painting a Color Map
It is often desirable to work simultaneously on a Color map and Normal map for many different types of game and other character types. As one map will influence the other, retaining a non-destructive workflow can provide the most effective solution to this challenge.
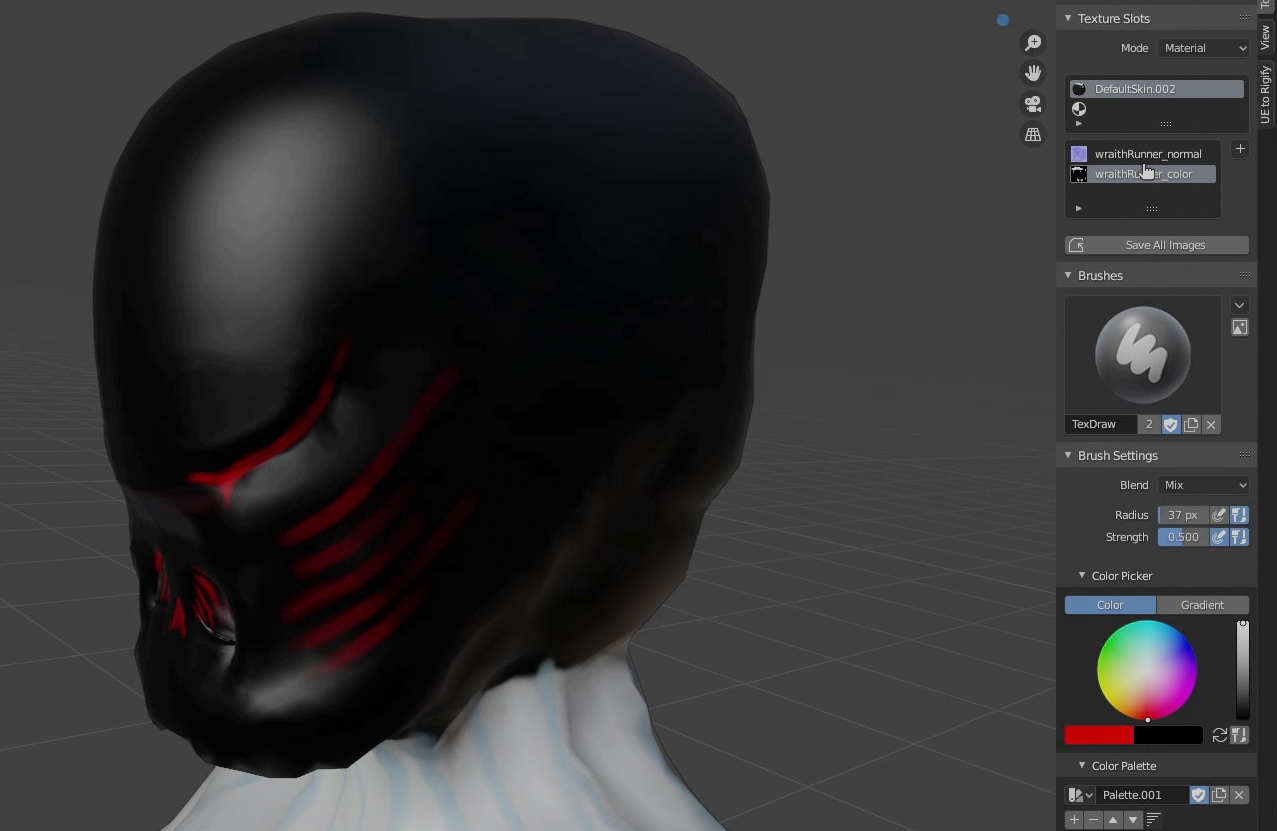
Switch to the Eevee Renderer and with your Base Mesh selectedsetup a Shading Network that utilizes the Normal map you just created. Now when you switch to Texture Paint mode you will be able to see how the Normal map effects your model while you paint on it.
If you want to make adjustments to your Normal map. Simply repeat the process.
- Hide the Base Mesh
- Select the duplicate
- Enter Sculpt mode
- Sculpt the duplicate
- Add a Shrinkwrap to the Base Mesh
- Apply the Shrinkwrap at the highest resolution
- Use cycles to bake a normal map
- Paint some more.
Exporting to Unreal
While working on your character it’s advisable not to wait until you have completed the character to test it within the game engine. By using Epic’s SendToUnreal plugin, not only can you easily add your character to your game but also adjust and modify the character within Blender and see the results instantaneously in the engine.
One of the great features of a non-destructive workflow also means that when exporting the models to a game engine you are not committing to anything that will break your workflow. In other words we can sculpt, paint, animate and export our model, check it out in the game engine then revert to Blender to tweak and update it.
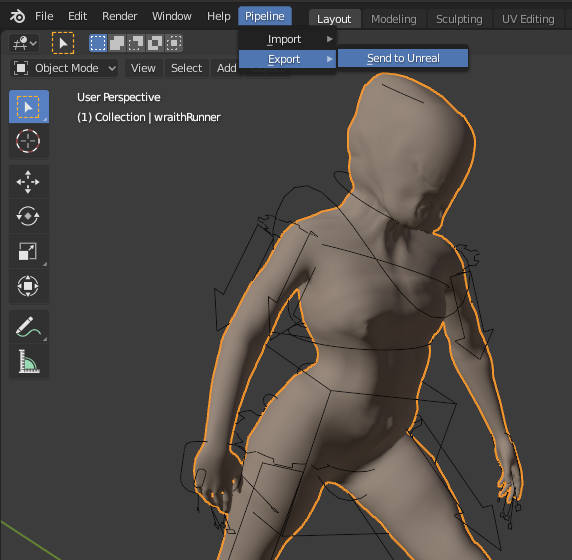
This becomes particularly relevant when we use Unreal Engine in conjunction with the SendToUnreal plugin for Blender.
Through this plugin we simply setup our Base Mesh and rig according to the plugins basic collections requirements, then export the character.
The character is readily available within the game environment with the added benefit that we can modify the character as above, and see the changes in the game engine update instantaneously.
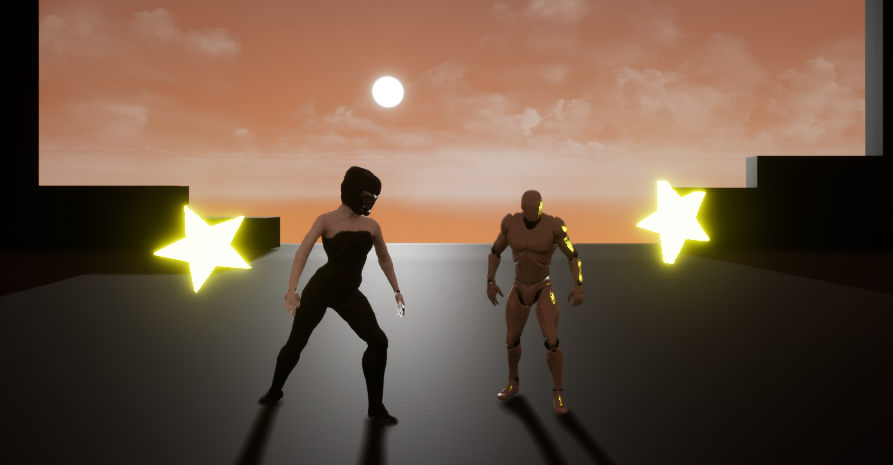
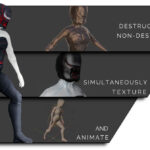
Diagram Illustrating Non-destructive Workflow for Character Development

- Starting out with Vue : Part 1
 What is a Software Framework A software framework provides a level of abstraction in writing application code relevant to an environment.Although this may sound like… Read more: Starting out with Vue : Part 1
 - How To Secure Your Site With HTTPS For Free
 Although HTTPS has been a standard web protocol for some time many hosting providers still do not necessarily provide support for enabling it “out-the-box”. In… Read more: How To Secure Your Site With HTTPS For Free
 - A Super Versatile Minotaur, Rigged And Ready To Rumble
 Lets dive into the details on the Minotaur character that has recently been published by RABBITMACHT. In this post, we are focusing on how you… Read more: A Super Versatile Minotaur, Rigged And Ready To Rumble
 - How To Build Game-ready Characters With A Non-destructive Workflow
 When developing 3D characters it’s important to retain as much of a non-destructive workflow as possible. This is particularly important with regards to games development… Read more: How To Build Game-ready Characters With A Non-destructive Workflow
 - Immediately Start Selling, with the Starter Store for Curated Merch
 Although 2020 may have been a tough year for many of us, that doesn’t mean we should be down and out about it. Some industries… Read more: Immediately Start Selling, with the Starter Store for Curated Merch