A software framework provides a level of abstraction in writing application code relevant to an environment. Although this may sound like a mouthful, it’s quite simple when you start to unpack it.
When we write code with JavaScript we are utilizing its environment to provide a context for our software and make something that would typically be usable out of our source code. However, as applications become more complex what is considered usable can start to require more development in order to match user expectations. Working with standard or, what developers often refer to as Vanilla JavaScript can result in the development of repetitive routines in order to meet basic user expectations (particularly when starting a project from scratch).
As a result software extensions often build on the noted environment, by adding some level of abstraction and addressing this repetitiveness. This essentially allows developers to start building with the assumption that some lower-level requirements have already been fulfilled by the extension.
Frameworks are software extensions that we add to our application, generally to provide a level of simplification to creating a coding outcome that might otherwise be cumbersome or not even possible to achieve without the extension.
In terms of JavaScript, this environment would generally be constrained to a web or mobile application where the code used for development provisions an interface making commonly utilized functionality and maintenance easier to access and implement.
A JavaScript framework such as Vue provides an interface for simplifying specific repetitive tasks when developing a JavaScript Single Page Application (SPA). Frameworks such as Vue will often have a set of rules or procedures that must be followed in addition to what qualifies for valid JavaScript code to apply the benefits of the framework within your application effectively.
What is Vue
Vue is an open-source JavaScript Framework, developed by Evan You (USA) in 2014. Its primary use is for building web interfaces and single page front end, web applications. The main source code repository for Vue is maintained within a GitHub repository located at
Vue is licensed under the permissive MIT license, with very few restrictions and a reasonable degree of licensing compatibility. You are therefore free to download, modify and redistribute the codebase. As well as utilize a combination of copyright and copyleft licencing for commercial or non-commercial usage.
You do not need to download and include the Vue source code in your program in order to use Vue. The Vue gitHub repository is an uncompiled version of the Vue source code that is primarily for the purposes of maintaining Vue, itself. We will discuss, in more detail, how to include and utilize Vue in your projects a little later.
Supported Paradigms and Architectural Patterns
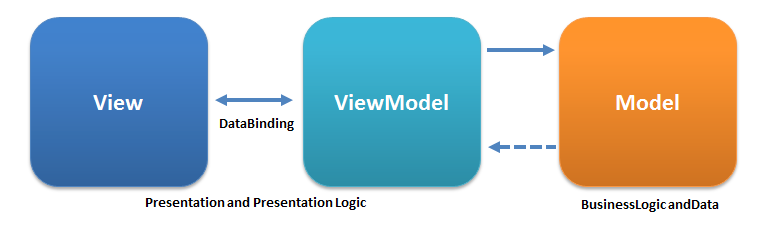
Amongst, the solutions Vue provides for application development is a multi-paradigmatic approach that builds on the Model-View-View-Model (MVVM) architectural pattern (but not strictly) and combines familiar concepts of Object Orientation Programming (OOP) such as an emphasis on data encapsulation.
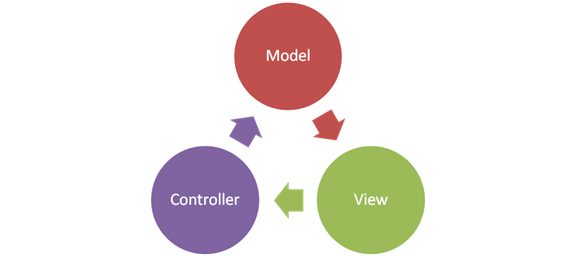
Vue is often described as fulfilling the purposes of the “View” within in the Model View Controller (MVC) programming paradigm. Although this may be true, it does not fully describe one of Vue’s most powerful features known as it’s reactivity system which when utilized tends to better describe Vue as following an MVVM architectural pattern.
Primarily MVC and MVVM are intended to decouple an application’s presentation layer from its functionality layer. In other words, we can use Vue to separate the design of our application, at it’s most basic, into two components that being,
What the user sees and interacts with from
what happens in the background after a user interacts with the application’s interface (or presentation layer).
The difference between MVC and MVVM becomes apparent in the emphasis that is placed on this separation in the former, and how this separation is maintained. As such, a developer utilizing the MVC approach will define how the presentation (View) and functionality (Model) layers interface and subsequently update each other.
The Vue approach differentiates in that there is an inherent link between the Model and the View. Updating the model, updates the view and updating the view updates the model. This is largely attributed to what is know as Vue’s reactivity system. Although Vue’s reactivity system will maintain the relationship between the Model and View and update both in realtime accordingly, it is, however, worth noting that there will remain aspects of presentation that need to be updated by the application’s codebase, and not inherently through the reactivity system.
When this is applicable largely depends on matching user expectations and can, for example, be as simple as explicitly adding the code that removes text from an HTML text input field after a user has typed in a value then hit the Enter key. In other words, the data entered into the text input field can effectively be captured within Vue’s functionality and work matching a developer’s expectations however the same data might persist within the User Interface this might not match user expectations. Of course, more complex examples of decoupling and reconciling data within the Model and View exist and would require an in-depth look at User Experience (UX) and User Interfaces (UI).
Vue is often described as combining the best of the popular AngularJS framework (maintained by Google) and the React library (maintained by Facebook). It can be lightweight at approximately only 33KB and is considered by many as easier to learn than it’s counterparts. It is also a Progressive framework meaning that it can be plugged into existing projects as well as combined with other 3rd party JavaScript tools.
In our next post we’ll explore the different ways you could include Vue in your project and get up and running with the Vue equivalent of a Hello World program.
Although HTTPS has been a standard web protocol for some time many hosting providers still do not necessarily provide support for enabling it “out-the-box”.
In this post, we will dive into the details around setting up HTTPS for your website using a completely free set of tools and also discuss some basic concepts around what it is and why it’s so widely utilized.
What is HTTPS SSL/TLS and why would I need it?
While browsing various sites on the internet you may have noticed that your browser throws a warning on occasion about a site not having a secure connection. You might also think twice about continuing to load the site when the warning prompts you to consider that any information you submit on the site (for example through a web form or other means) could be intercepted by an unintended recipient.
Hypertext Transfer Protocol Secure (HTTPS) provides computers or nodes on a network (or many interconnected networks, like the Internet) with a set of rules they can agree on for securely transporting data between requesting and receiving nodes. This is particularly significant in contrast to HTTP, which does not require data in transit to be encrypted.
When a connection is established between receiving and requesting nodes on such a network, only those nodes should have the key to decrypt that data in transit. This essentially means that even if the data you submitted via a webform on an HTTPS site is intercepted by an unintended recipient it will remain encrypted.
Transport Layer Security (TLS) is a common type of encryption used with HTTPS connections. It is also the successor of Secure Sockets Layer (SSL) and most often provides the Secure component with the HTTPS protocol.
What do I need to get started?
In order to secure your site’s connection with HTTPS you will need an SSL/TLS certificate. These certificates can only be issued by a Certificate Authority (CA) and depending on your needs, CA services can be simple to complex with pricing that scales accordingly.
Let’s Encrypt is a nonprofit, global CA that issues SSL/TLS certificates at no cost in the interests of a more secure and safe Internet.
To get started you will need,
A hosting plan that allows SSH access. This can usually be accomplished with a standard cPanel installation which many hosting providers supply even if you are using a basic shared hosting package.
As previously noted, we will be using Let’s Encrypt as a CA in order to obtain a recognised SSL/TLS certificate that will be valid for 90 days.
We will be using GetSSL to request the certificate and validate ownership of your domain.
As SSL/TLS certificates will expire we will finally set up a Cron job to auto-renew the certificate.
Setting up remote server access with Secure Shell Protocol (SSH)
Although many hosting providers do offer Terminal access as part of a standard cPanel installation, some do not.
As such, we will look into setting up SSH on your local Linux desktop which will allow you to remotely access the server where your site is being hosted.
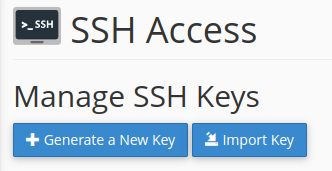
In order to setup SSH you will first need to generate private and public keys, that when successfully paired will create a secured remote connection to your site’s server.
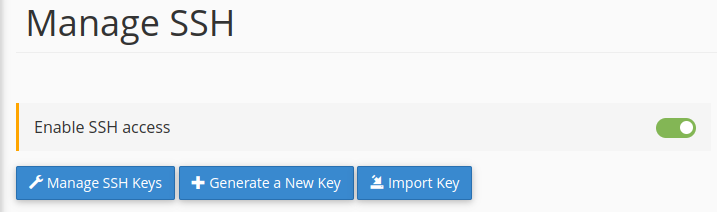
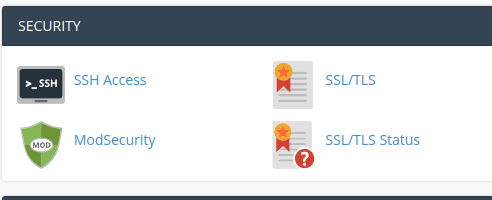
Under the Security section of cPanel open the SSH Access app and click the Generate a New Key button.
After you have added a password for the keys you will receive a similar output to below. If when you created the pair you also chose to enter a passphrase, you will also need to take note of this passphrase as it will be required to connect remotely to your site’s server via SSH.
Generating public/private rsa key pair.
Enter passphrase (empty for no passphrase):
Enter same passphrase again:
Your identification has been saved in /home/username/.ssh/testkey.
Your public key has been saved in /home/username/.ssh/testkey.pub.
Unless you are managing multiple pairs, you would not need to enter a name for the keys as they would be assigned the name id_rsa From this output, it’s important to note where the identification key has been saved. This is your private key and it should not be shared. In conjunction with the password to your server or cPanel account it can be used to compromise access to your site’s server.
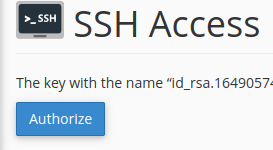
You will then need to Authorise the use of the public key by accessing its Management tool.
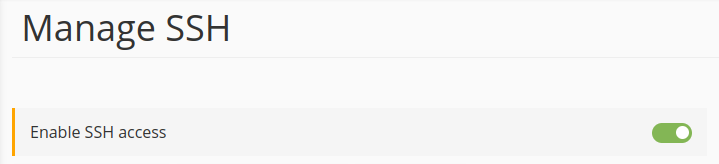
And if your hosting package requires it, further Enable SSH access.
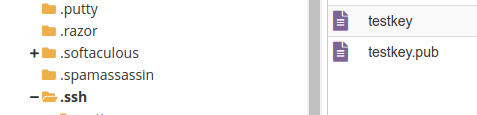
You will then need to download a copy of your identification key (private key), this can be accomplished with an SFTP client (such as Filezilla) or you could simply use the cPanel File Manager.
Back on your local desktop, paste a copy of the private key in your equivalent, following location
/home/username/.ssh/
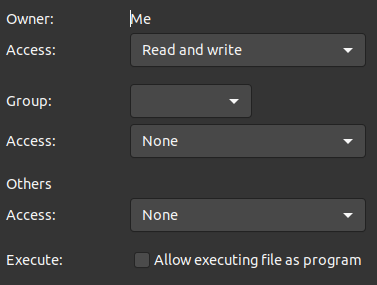
You will then need to change permissions for the key such that only you are able to read/write it.
Permissions set to 600
You can now open a Terminal to connect to your server.
If you are using a shared hosting package you will first need to find out the address of the server that is hosting your site as well as the relevant port number.
In cPanel you can find out the server name, under Server Information in the General Information section. However, this does not necessarily equate to your server’s full address and port number.
Alternatively, you could also use your server’s IP address to establish an SSH connection. With your username, IP address and port number the command would resemble the following format,
ssh username@162.123.0.1 -p12345
Where ssh is the command being invoked. username would be the username used to log into your site’s cPanel account @ is required to precede the address 162.123.0.1 is an example of what an IP address could look like and -p precedes the number of the port associated with your site
If you are unable to locate the information required under the Manage SSH cPanel app or from your cPanel Server information section, then you may need to contact your hosting provider for further assistance.
Once you have the required information open a Terminal instance and execute the noted command. If you have SSH installed. it will then try to match the private key on your local desktop with the public key on your side. If there is a match you will be prompted for the passphrase you input when creating the private and public keys (from above).
You will then need to enter your password, this will be the same password associated with the username from the above command, that you use to log into your site’s server (or cPanel).
If you have successfully logged in you will then see that the command prompt has changed to username@servername
Installing and configuring GetSSL
We are now ready to install and configure GetSSL in order to request and install an SSL/TLS certificate from the Let’s Encrypt global CA.
Run the following command via SSH to obtain a copy of the GetSSL installation script and set its permissions,
Use the following command with the create flag to create the default config files, thereafter you will be able to find the applicable files in the same location such as /.getssl/
./getssl -c yourdomain.com
Where yourdomain.com is the domain you would like to install HTTPS for. The below list represents the files and folders now installed.
You will then need to cd into the following directory in order to edit the config file.
It’s also worth noting that there is another config file with the same name that exists at a higher level in the directory structure. If you are setting configs for multiple domains you could use this config file as such, however throughout this guide we are only focusing on the config file within the subfolder /yourdomain.com. All configs, as such, will only apply to this domain.
cd ~/.getssl/yourdomain.com
You will then need to open the getssl.cfg config file within a text editor to modify it. If you have access to vi on Linux you could open it with the following command,
vi ./getssl.cfg
Once in vi you can use h, j, k and l to navigate the editor. Then i to switch to insert mode. ESC to return to navigation mode and :wq to save and quit.
Navigate to the line where you see the following variable commented out
#ACL
Uncomment out the line by removing the # character and replace the location assigned to ACL with a path where your site’s HTML files are located for example,
You will then need to create the directories /.well-known/acme-challenge/ under the above-noted location on your server. This is necessary in order to prove that you have ownership of the resource.
If you would like both yourdomain.com and www.yourdomain.com secured.
Navigate to the line where the SANS variable is defined, uncomment it and assign it as such,
SANS="www.yourdomain.com"
No need to include your primary domain here. Save and exit the config file.
Back in your GetSSL directory via SSH type,
./getssl yourdomain.com
This will verify your ownership of the domain, request certificates then save the certificates and private key with something similar to the following output if all goes well,
Verification completed, obtaining certificate.
Certificate saved in /home/username/.getssl/yourdomain.com/yourdomain.com.crt
Your domain is now successfully staged and ready for the production certificates to be installed.
You can verify if this has been successful as, when you look in the location noted from the previous output you will see the .crt files that were requested during staging.
You will then need to delete these .crt files before proceeding with certificate installation. This is essentially because we need to change the config file and then re-run the getssl script. As the crt’s already exist and were only just requested, attempting to run this script without deleting the existing crt’s will result in the script halting given that the certificates have not reached an expiry period yet.
To edit the config file reopen the file that was previously edited,
vi ~/.getssl/yourdomain.com/getssl.cfg
Scroll down the section where the variable CA is initialised and comment out the staging value, then uncomment the assignment to the production location. NB. The # (hash character) is used to denote comments.
# The staging server is best for testing
#CA="https://acme-staging-v02.api.letsencrypt.org"
# This server issues full certificates
CA="https://acme-v02.api.letsencrypt.org"
Save and exit the file as per normal with vi, by typing :wq <Enter>
You can now run the getSSL script again to request the production-ready certificates.
./getssl yourdomain.com
You should receive a similar output to the first time you ran the script. However, this time you will keep the certificates returned in order to finalise the installation.
Installing the SSL/TLS Certificate
Back in cPanel go to the SSL/TLS app in the Security section.
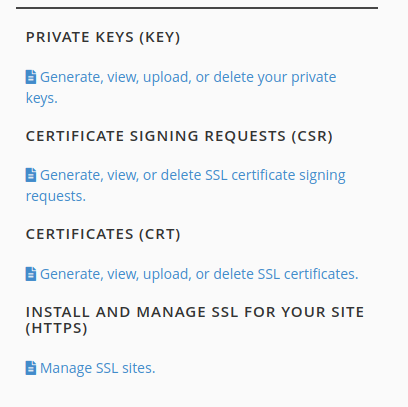
From within this app, you should have access to Manage SSL for your site
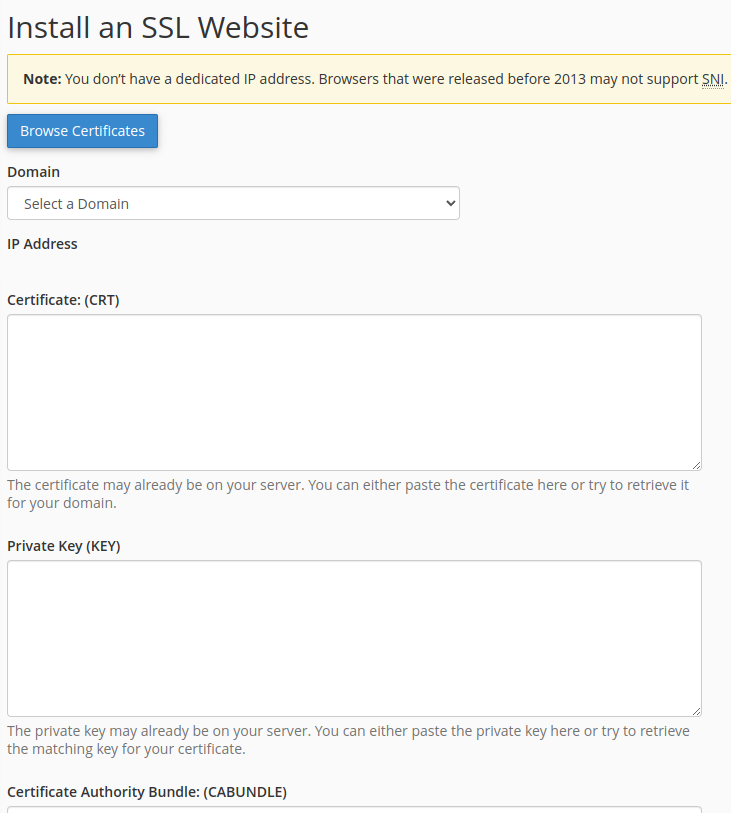
From here you should have access to the Install SSL Website interface
Select the appropriate domain from the Domain drop-down list, then open copy and paste the contents of the following files generated by getSSL into the following locations,
Click on the Install Certificate button, and if all goes well you should now be able to navigate to your site via HTTPS
Auto-renewing your certificate
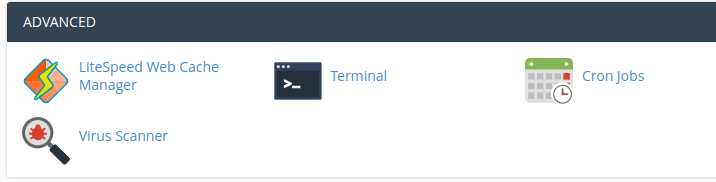
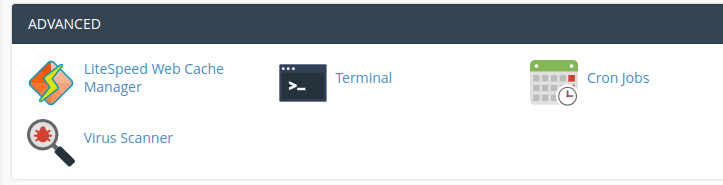
GetSSL has many useful features including the ability to utilise a Cron job to auto-renew certificates that are about to expire. In cPanel under the Advanced section, click the Cron Jobs app to set up a script that is executed according to a schedule.
As noted Cron jobs run according to a schedule and GetSSL returns certificates that will expire after 3 months, therefore you should not need to request a renewed certificate prior to that timeframe. You can set up your Cron job to run based on your requirements, however from what I have experienced certificates will not renew if they are less than a month old.
The command you could use for your Cron job would require the location of the getSSL script that was fetched via cURL, with the filename and the following flags,
/home/username/./getssl -u -a -q
The -u flag updates getSSL if a newer version exists, the -a flag auto-renews any certificates that are about to expire and the -q flag will only email you if any errors are returning during the job.
Now click the Add New Cron Job button and you should be good to go!
Although 2020 may have been a tough year for many of us, that doesn’t mean we should be down and out about it.
Some industries have even experienced growth in the time of the Corona Virus Pandemic. In particular, if you work in the e-commerce industry you might have encountered many client’s growth last year with regards to sales of various product types such as groceries, clothing and electronics.
Now, that doesn’t mean it’s time to rethink your vocation in hospitality for web development but it certainly does mean there are some fundamental shifts that many consumers have undertaken and that the potential for residing to a dismal outlook for 2020 in terms of commerce can diminish if you are able to adapt quickly to these new behavioural shifts.
One of the most obvious shifts in commerce has been towards online shopping. Yes, I know, online shopping and e-commerce are nothing new but certainly, for many developing nations the shift towards this platform has brought with it many changes in consumer behaviours and according to the United Nations Conference for Trade and Development these behaviours are unlikely to shift back.
With social distancing playing an important part in reducing the spread of the virus, this behavioural shift has translated to many consumers that previously were apprehensive about online shopping. Many of these buyers have now converted to relying on remote shopping as a primary means for providing essential items as well as luxury goods, particularly when the Christmas and the festive season of 2020 began and so too did greater enforcement of social distancing measures for several nations. For these customers being forced into overcoming their fears of online shopping, new-found confidence in e-commerce is arising and showing no signs of diminishing even when lockdown restrictions are eased.
Many larger retailers have already doubled-down on their online sales, resulting in averting drastic potential losses while smaller companies which may not have had the capital or resources to make the transition quite as quickly have incurred a great deal of loss and even succumb to closure.
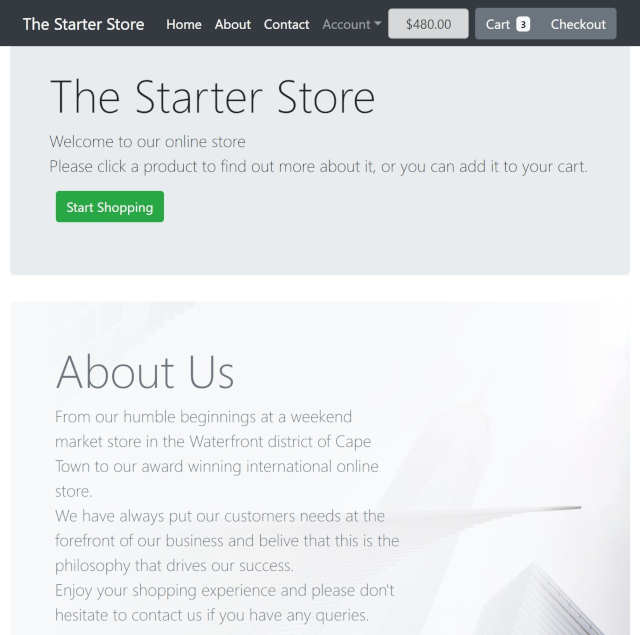
The Starter Store for Curated Merch
Some of the things I really miss doing with my family pre-pandemic is visiting local markets, rummaging through second-hand stores and finding peculiar items at a café that doubles up as a curio shop. Sadly, a lot of these sellers have faced some very difficult times while others have closed their businesses permanently. It is with these individuals in mind that I decided to create the Starter Store for Curated Merch.
The Starter Store is an online platform for merchants with a personality that reflects in their goods.
It’s easy enough to start your own online store as there are many platforms out there for sellers, however, if this is something you have tried before and abandoned the project you would not be the first. Many sellers entering the online market space can easily become overwhelmed by the steep learning curve required to materialize the perfect store and often have to revert to expensive developers. Another common hurdle for new online shop owners to overcome is how to connect the right customers with your products, eventually leading towards expensive advertising campaigns with little or no returns.
The Starter Store for curated merch is not a cookie-cutter, online shopping platform, nor is it a platform to leverage taking on Amazon or other multi-vendor stores. As you can imagine from its namesake, it’s about starting up a store and building it up over time through a scalable and secure platform.
How the store scales is entirely up to you, as you work closely with a personal consultant that advises you and works towards harmonious implementations of technologies with a seller’s personality. You upgrade your store when you are ready to do so and you control your store’s inventory at your own pace.
And if you want to do it all yourself, you will have all the technical essentials at your fingertips and all you need to do is add the store’s content and start selling. It’s entirely up to you!
With the Starter Store, you never need to feel overwhelmed if you are not technically-minded, we take care of all the heavy lifting for you so that you can focus on what you love, getting your products in the hands of your customers.
If you don’t already have your online store up and running there’s never been a better time to get started selling online. Not only will this help with regards to your site getting indexed by search engines sooner and thereby give you a greater opportunity of being found by your customers but it’s also worth taking into consideration that a far greater number of people are currently shopping online than ever before and that this uptake is set to continue, particularly in developing nations. As an online store owner, you are not restricted by physical distances in terms of reaching customers across the globe.
One of the many great qualities of the Starter Store is that you can build your store from just a few products to as many products as you want overnight! You also don’t need to worry about hosting, or domains nor the technical hurdles to overcome when setting up an e-commerce site as we have all of that covered for you. Each Starter Store comes with a package that lasts an entire year or as long as you want.
Don’t get side-tracked with coding
The Starter Store is integrated with all the right technologies to give you the edge in acquiring new customers without you having to write a single line of code.
With Google Analytics integration you will be able to aggregate the data needed to ensure that you are providing your customers with the products they are looking for.
If you’ve never considered SEO (Search Engine Optimization) nor analyzed website traffic before, not to worry we can keep a firm eye on your traffic for you and advise on the best practices for increasing your site’s engagement.
Receiving and refunding payments is also a breeze with the industry-leading, payment gateway, Paypal. You also have the option to accept payments via Credit or Debit cards already integrated into your store. No clumsy card-swiping machines! Simply get paid instantly, and you will receive an email with all the details to fulfil your customer’s orders.
If you are like us and always thinking about your own and your customer’s security, the Starter Store has you covered there too. Your site is delivered with the new standard in web security using HTTPS with end to end encryption and a digitally signed SSL certificate. As a shop owner, we feel that you should never have to be concerned about securing your customer’s data, you focus on selling and we’ll take care of the rest.
Watch the video below for a brief introduction to the beautifully responsive and intuitive interface of The Starter Store and get in touch if you have any further queries or simply just get started!
Privacy & Cookies: This site uses cookies. By continuing to use this website, you agree to their use.
To find out more, including how to control cookies, see here:
Cookie Policy